Update 8/19/2012: I just tried again watching a couple of different live sporting events at home via espn3.com, and today, it worked fine -- I wasn't blocked. Barring any word on this from Comcast or ESPN, I guess we'll just need to wait until kickoff to see if watching college football on espn3.com this fall via an Internet-only Comcast subscription is going to work or not.
Update 8/30/2012: ESPN has posted an WatchESPN / ESPN3 FAQ. In short, it sounds like ESPN3 now only carries "online-exclusive" content -- that is, minor games that aren't being shown on ESPN/ESPN2. To watch ESPN content that's being shown on TV online, you need "WatchESPN" -- and that requires a paid TV subscription to ESPN (on top of a broadband Internet subscription).
So, Internet-only customers are out of luck this year, sounds like. :-( Maybe ESPN will sell their content directly to consumers in the future, like Major League Baseball has already figured out how to do. You can buy an entire season of MLB (thousands of games!) for $20 or $25, depending on type of device; I'd happily pay $25 for an entire season of college football.
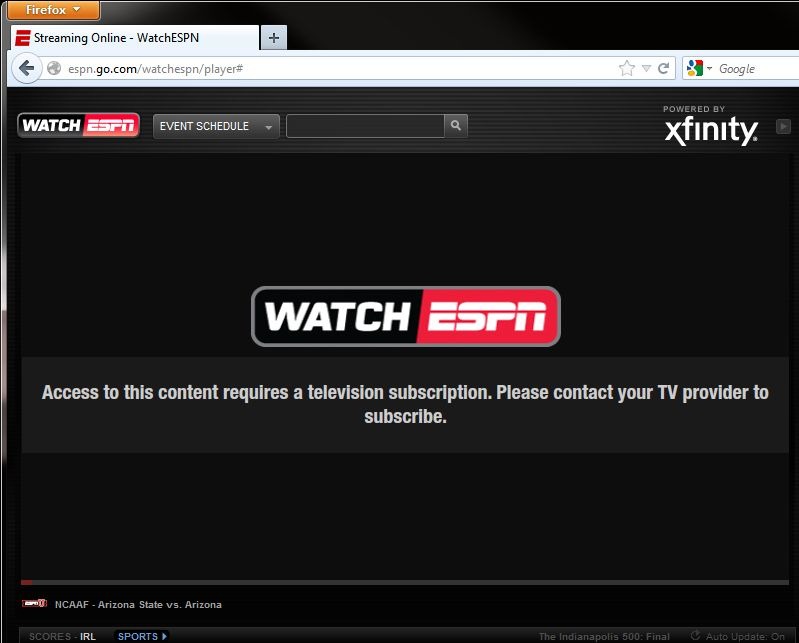
For the last 3 years or so, I have not subscribed to any cable or satellite TV service, going instead with free over-the-air HD network television via a DIY antenna, and using AT&T DSL and (later) Comcast cable for Internet service. I’m a college football fan, and in the fall, I have for the past couple of years used the very nice service at espn3.com (now rebranded as WatchESPN) via my HTPC to watch college football games that were shown on one of the ESPN network channels, but not shown on the ABC network (which I can watch in HD for free via antenna). Upon attempting to demonstrate this setup to a friend of mine this morning, though, I was surprised to be presented with a new error message when attempting to view a live event on espn3.com: “Access to this content requires a television subscription. Please contact your TV provider to subscribe.” 
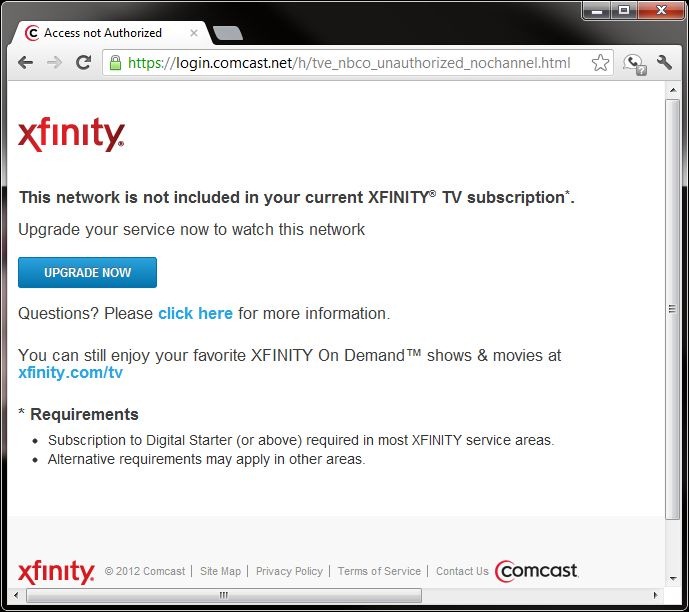
:-( Apparently something has changed in the arrangement between ESPN and Comcast Xfinity – without any notice to me, the customer – where it’s now not just checking to see if my ISP is supported by ESPN3; it’s now additionally checking to see if I have a television subscription through that same ISP (Comcast), which I do not. If I did have a full television subscription, I wouldn’t be trying to use espn3.com; I’d just turn on my television! Apparently this is the new trend, as I also found just last week that my family is not permitted to access any of the live 2012 Olympics coverage currently available in the United States via nbcolympics.com, for the same reason: I only have an Internet subscription through my ISP, not a full television subscription. 
From a standpoint of trying to be fiscally responsible, it isn’t worth it to me to pay an additional $200 to be able to watch 14 Saturdays’ worth of college football from home this fall (figuring about an additional $50/month for the duration of the 4-month college football season for a television package from Comcast that includes ESPN, above and beyond the Internet service that I’m already paying for). So it looks like I’ll be visiting friends’ homes or going to sports bars to watch any college football game that aren’t being shown on the broadcast networks (ABC, CBS, and for Notre Dame home games, NBC) this fall. Guys, if you’re reading this, I’ll bring the beverages! This development is pretty disappointing, to say the least. I’d consider switching ISPs – if Comcast didn’t have a local monopoly on high-speed Internet at my location. Hopefully, in the future, ESPN and other content providers will figure out how to profitably provide their coverage directly to consumers via the Internet, regardless of ISP. Clearly, the technology is ready and available (it worked great for me for the last couple of college football seasons prior to this year); it’s just the business side of things that needs to be worked out. Ah, well. Ultimately, I’ll be very happy/thankful if this situation is the biggest problem that my family encounters this fall! #firstworldproblems
This past week, my HTPC spontaneously started having a problem where, when booting, after the Windows logo was displayed, I would just get a blank (black) screen. Windows apparently loaded ok – I just couldn’t see anything the screen. One afternoon, things were working fine, but later that evening (not having manually made any changes to the PC), the problem started occurring. In an attempt to keep this post brief, I’m going to omit the myriad of troubleshooting steps that I went through to try to correct this, and just provide the one that worked for me. If you’re having a similar issue, you can skip to the end of this post for my solution, although I’d suggest at least skimming the System Configuration and Symptoms to get a better idea of whether or not this solution might be applicable for your situation as well. System Configuration This problem occurred on a PC running Windows 7 Home Premium 64-bit, with an nVidia GeForce GT 430 video card, connected via HDMI cable to a TCL L40FHDF12TA LCD HDTV. Prior to the problem occurring, the PC was successfully sending both video and sound to the HDTV via an HMDI cable, connected to the HDMI-out on the video card, and one of the HDMI-in ports on the TV, at the TV’s native resolution of 1920x1080 (1080p). Symptoms - Upon a reboot, the PC would correctly display the text-mode POST information, followed by the graphical Windows 7 logo; but after that, the TV would just display a blank (black) screen. The TV would report it was getting a 1280x720 signal from the PC. Also, the normal Windows boot sound did not play (even though I did have the volume up on the TV).
- The problem would persist even after turning the TV off and back on, or changing channels on the PC and then changing back to the “HDMI 1” input, or when disconnecting and reconnecting the HDMI cable (without rebooting).
- When booting into Safe Mode, the Windows desktop would display properly, and the system would be usable (albeit without sound, and at a reduced screen resolution).
- At one point midway though the troubleshooting process, I got things “partially fixed” such that the Windows desktop would come up when booting normally (not into Safe Mode). (Unfortunately, I don’t recall exactly which specific troubleshooting step I took over the course of the multi-hour troubleshooting process to make this happen.) When in the system was in this state, I observed multiple problems:
- In the Screen Resolution dialog, Windows would only let me let me set the monitor to a maximum resolution of 1280x720 – not the full resolution of 1920x1080 supported by the TV.
- Windows recognized the monitor as a “Generic non-PNP monitor”, not as the actual TCL TV model.
- No sounds would play. In the Sound dialog (accessed from the Control Panel), there was an nVidia HDMI sound output listed, but it had a listed status of “Not plugged in” (even though the HDMI cable actually was plugged in).
- The nVidia Control Panel software showed that the monitor was connected via DVI – not via HDMI as it actually was connected. The software didn’t display a dropdown that would allow the connection type to be changed.
- The same symptoms persisted when connecting the PC to the TV via the video card’s DVI-out port, the TV’s HDMI-in, and a DVI-HDMI adapter (and rebooting).
Solution After trying many things to fix this, what eventually ended up working for me to fix the problem was to use Windows 7 System Restore to restore the system to a restore point a couple of weeks before the problem started happening. Once this was done, all symptoms immediately went away; the TV once again successfully sent video and sound to the TV, Windows recognized the monitor as a TCL TV (not as a “generic non-PNP monitor”), and Windows allowed me to change the screen resolution to the TV’s native resolution of 1920x1080. I’m still somewhat mystified as to the initial root cause of the problem; my best guess is that some Windows system file related to display output was (somehow) damaged, and that this was corrected by the System Restore. The only thing listed on the System Restore dialog between the present time and the restore point that I selected (other than several manual video driver updates that I had applied during the troubleshooting process) was a series of automatically installed Windows Critical Updates. (The problem apparently wasn’t with one of the nVidia video driver files, as I tried installing multiple different versions of the display driver software to correct the problem, without success. I even went so far as to use a “driver cleaner” utility to clean out all of the old nVidia files and registry entries before re-installing a new driver.) If you’re having the same problem that I was, this solution may or may not work for you. Still, it may be worth trying a System Restore as part of your troubleshooting process if other more obvious solutions (checking cables, reinstalling the video driver, etc.) aren’t working for you. I hope this helps!
A project that I took on over this past Christmas break was to get my HTPC to display on an LCD display mounted in the PC’s case informaton about the TV program actively being recorded by the Windows Media Center DVR, so that I could see what was being recorded even when the attached TV was off. The basic hardware/software setup for this project was: - LCD Display: An nMediaPC PRO-LCD-B display, which is a blue LCD display that can display 2 rows of 20 characters, and fits into a standard PC case 5 1/4” drive bay.
- A PC running Windows 7 64-bit, configured to act as a DVR using Windows Media Center.
This project turned out to be significantly more complex that I originally planned on it being, although after nearly a full day of tinkering, I did finally get it to work! The remainder of this post is a set of instructions for what I did to get the LCD display working to display the active Windows Media Center recording (leaving out many of the missteps and dead ends I encountered along the way, although I do include a couple of the major ones as an appendix at the end of this post).  I’m providing this information for my own future reference and in the hopes that it may be helpful to you, the reader; however, please note that this is in no way an “official” set of instructions. It worked for me, but may not work for you. Your mileage may vary. I am awarding this post the official Jeff Atwood / Jon Galloway “It works on my machine!” seal of approval. I’m providing this information for my own future reference and in the hopes that it may be helpful to you, the reader; however, please note that this is in no way an “official” set of instructions. It worked for me, but may not work for you. Your mileage may vary. I am awarding this post the official Jeff Atwood / Jon Galloway “It works on my machine!” seal of approval.
These instructions assume that you already have Windows Media Center actively running as a DVR on your PC, and that you have a reasonable level of technical expertise, and patience – there are a lot of steps here, and quite a few “moving parts” to get working together! Enough disclaimers; on with the show! 1. Purchase the nMedia PRO-LCD-B LCD Display Purchase the nMediaPC PRO-LCD-B. As I write this post, it’s available from newegg.com for US $38 shipped. Other nmMdiaPC PRO-LCD models may work with these instructions as well, but I only tried them with the PRO-LCD-B. 2. Install the PRO-LCD-B hardware Power off your PC, and install the PRO-LCD-B in an empty 5 1/4” drive bay. The install was fairly easy; the PRO-LCD-B has two connections: One to a standard disk drive power cable from the PC’s internal power supply, and one to a 4-pin USB connection on the motherboard. My HTPC’s motherboard (a Gigabyte AMD GA-MA785GM-US2H) had several such 4-pin USB leads available on the motherboard, even with all of my case’s front and rear USB ports already hooked up. (When I powered my PC back on, I *think* I saw some stock/default text on the LCD display, but I’m not 100% sure about this – and I’m not about to voluntarily revert my HTPC to that state at this point just to double-check.) :-) 3. Install the PRO-LCD-B driver software Download and install the PRO-LCD-B driver software from the nMediaPC website: http://www.nmediapc.com/LCD/download.htm I also have a mirrored copy (current as of January 2012) in the event that the file ever becomes unavailable from the nMediaPC site: http://jonschneider.com/jsblog/CDM20600.zip (1.8 MB) (Although at this point my next step at this point was to install nMediaPC’s “M-Play Home Center (MHC)” software to drive the LCD display, this turned out to be a dead end, and I recommend you skip it if your goal is to get your LCD display to show the actively-recording Windows Media Center program. See the “Dead Ends” appendix at the end of this post for more on this.) 4. Install LCDSmartie LCDSmartie is a free open-source program for Windows that can drive the display of text on LCD display devices, including the PRO-LCD-B. I downloaded and installed the 5.4.2.92 beta release (dated June 8, 2011). LCDSmartie downloads are available from here: http://lcdsmartie.sourceforge.net/smartied.htm I mirrored the 5.4.2.92 beta release here: http://jonschneider.com/jsblog/lcd_smartie_v5.4.2.92 Beta.zip (2 MB) Uncompress the “lcd_smartie_v5.4.2.92 Beta” folder and its contents from that .zip archive. I put this folder onto the root directory of my C: drive. 5. Install the lisvfd.dll display driver for LCDSmartie None of the out-of-the-box drivers that come with the LCDSmartie 5.4.2.92 release work with the PRO-LCD-B. However, there is another driver available on the LCDSmartie site that did work for me: the “L.I.S VFD” display driver. It’s available on the LCDSmartie SourceForce site from here: http://downloads.sourceforge.net/lcdsmartie/lisvfd.zip?download If that link doesn’t work anymore, try looking for it on the LCDSmartie site download page under “Plugins”, or else download my mirrored copy: http://jonschneider.com/jsblog/lisvfd.zip After downloading that, place the lisvfd.dll file from the .zip archive into the “displays” folder under your LCDSmartie installation folder. 6. Configure the lisvfd.dll display driver in LCDSmartie Run LCDSmartie (via the LCDSmartie.exe file in the extracted “lcd_smartie_v5.4.2.92 Beta” folder that you created in step 4 above). When LCDSmartie comes up, it should show a small window showing the content that it is sending to the LCD display (although nothing will actually appear on the PRO-LCD-B until the steps in this section are completed). Click the “Setup” button in the lower-left corner of the window to bring up the Setup window. In the LCDSmartie setup window, in the “LCD Size” dropdown in the Display Size section in the top-right corner, select the “2x20” value (the display size of the PRO-LCD-B). Next, still in the Display Size section, click the Plugin tab. In the Display Plugin dropdown, select lisvfd.dll. (This option will only appear if you copied the lisvfd.dll file into the LCDSmartie “displays” subfolder in the previous step.) For the next step, you need to know what COM port your PRO-LCD-B is running on. To determine this: - Bring up the Windows 7 “Devices and Printers” screen by opening the Windows Start menu, typing “devices” into the text field, and selecting the “Devices and Printers” option that appears.
- On the “Devices and Printers” screen, in the “Unspecified” section, look for a device named “FT232R USB UART”. Right-click on it and select Properties from the context menu.
- On the Properties window, select the Hardware tab.
- In the “Device Functions” table that appears, look for an entry like “USB Serial Port (COM4)”, where the “4” might be any number. Make a note of that number.
- Close the FT232R properties window and the “Devices and Printers” window.
Then, return to LCDSmartie. (It doesn’t appear in the Alt+Tab list on my machine, so you may need to select it from the Windows taskbar). In the LCDSmartie Setup dialog, in the Display Settings section, in the Plugin tab, in the Startup Parameters field, enter “COM4,38400” where “COM4” is the actual COM port value from the Devices and Printers section above. - If for whatever reason you couldn’t find the FT232R device in “Devices and Printers”, then an alternative here might just be to try entering different values for the COM port number in this field to see if you can get something to display on the PRO-LCD-B screen.
Once this is done, click OK on the LCDSmartie setup dialog. You should now see some text from LCDSmartie (a scrolling LCDSmartie logo, and possibly some other information) appear on the PRO-LCD-B screen on your PC! 7. Install the “LCDSmartie dll to display Windows Media Center status” Once LCDSmartie is successfully configured to display information on the PRO-LCD-B screen, the next step is to get it to display what’s currently recording in Windows Media Center. A plug-in called “LCDSmartie dll to display Windows Media Center status” by Dave Perrow can be used to do this. Download the “LCDSmartie dll to display Windows Media Center status” from its website, here: http://mcedll.codeplex.com/ Or grab my mirrored version (current as of January 2012): http://jonschneider.com/jsblog/MCE_DLL.zip Extract the MCE_dll.dll, MCE_dll.cfg, and MCE_dll.ini files to the “plugins” folder under your LCDSmartie installation. 8. Install Windows Media Center TCP/IP Controller The MCE_dll plugin relies on another piece of open-source for Windows called Windows Media Center TCP/IP Controller (or “TcpIpController”) to function. TcpIpController publishes a “feed” of what Windows Media Center is currently doing (including what program it’s recording) to a particular TCP port on your PC, where it can be read by MCE_dll. I installed the “Win7 64 and 32 bit Alpha - button command fix” release of TcpIpController. (Note: This is not the default release of TcpIpController – I’m not sure whether or not the default release works with MCE_dll.) Download the “Win7 64 and 32 bit Alpha - button command fix” release of TcpIpController from its codeplex.com website here: http://vmccontroller.codeplex.com/releases/view/23251 Or get this version from my website: https://jonschneider.com/jsblog/Setup%20x64.msi Run the downloaded .msi file, and continue through the prompts to complete the installation wizard. When the installation finishes, reboot – without a reboot, TcpIpController will not work properly. 9. Configure TV channel names The MCE_dll plugin will display the name of the channel being recorded, along with the channel number and the name of the program being recorded. It gets the channel number and program name from Windows Media Center (via the TcpIpStatus plugin), but we need to manually supply the channel names. To do this, in a text editor, open the MCE_dll.ini file that you previously placed in the “plugins” folder under the LCDSmartie folder, and replace all of the values with the channel numbers and names for your local channels. (You can skip this step if you happen to live in the same region of Scotland as the MCE_dll author.) :-) 10. Configure LCDSmartie to use the Windows Media Center status (MCE_dll) plugin Now that we have the MCE_dll plugin and its TcpIpController dependency in place, we need to configure LCDSmartie to use them. Bring up the LCDSmartie Setup dialog. In the “Screens settings” section, make sure Screen 1 is selected (set the value of the Screen field to 1), and then replace the values in the two large fields in this section (which represent what LCDSmartie will display on the PRO-LCD-B screen): Line 1: $dll(MCE_dll.dll,1,,) Line 2: $dll(MCE_dll.dll,2,,) An explanation of what these values mean, along with some other values you can play with, can be found on the MCD_dll plugin site. Finally, click OK. If your Windows Media Center is actively recording something, you should now see the channel number, channel name, and show name on the PRO-LCD-B display! The finished product on my HTPC (with the PRO-LCD-B installed just below the DVD drive): 
(The actual LCD display image is far cleaner/sharper than it appears in the photo; my iPod camera refused to take a nice image of it.) 11. Configure LCDSmartie to run at Windows startup In the LCDSmartie setup dialog, in the Startup/Shutdown tab, click the “Autostart hidden” radio button, then click OK. Appendix: Dead ends A couple of the things that I tried that didn’t work: - A piece of open-source software for Windows called LCDWriter by “andy vt” says that it will also get an LCD display to display what Windows Media Center is currently recording, among several other functions. However, I couldn’t get the 64-bit version to successfully display anything to my PRO-LCD-B; and the 32-bit version (which can work with LCDSmartie display plugins via a wrapper dll) gave me a runtime error on my PC every time I tried to run it, so I eventually gave up on getting it to work on my PC.
- The default PRO-LCD-B display software from nMedia has a lot of cool functions, and it was very easy to install and get initially working, but I was unable to successfully get it to display the recording program in Windows Media Center. It also seemed to be slightly buggy in other ways (at least for me); for example, after exiting Windows Media Center, the PRO-LCD-B would continue to display “Channel Listing”, for example, instead of reverting back to the default date/time display.
Appendix: Thanks! Thanks to the authors of LCDSmartie, the lisvfd.dll display driver, the “Windows Media Center status” plugin for LCDSmartie, and the Windows Media Center TCP/IP Controller. Without all of those open source projects having been developed and made freely available, I wouldn’t have been able to complete this project – or at least, it would have taken me significantly longer to code up a solution myself!
This is the forth in a series of posts I’m writing about an HTPC (Home Theatre PC) build that I recently completed. To see a list of all posts in this series, click here. Before finalizing a parts list and placing an order for the parts for my new HTPC build, I was fortunate to be able to gain access to a "test machine": A newly-built, working HTPC that my friend Dave was kind enough to let me borrow for a few days. Specs on this machine: | CPU | Intel Core 2 Quad | | Motherboard | Intel BOXDG43GT LGA 775 | | Memory | 2 GB Kingston DDR2-800 | | Onboard Video | Intel GMA X4500 with HDMI | | Add-on Video Card | (None) | | Operating System | Windows 7 Home Premium 64-bit | I brought the Intel HTPC home and hooked it up to my TV, a Philips 3000 series LCD HDTV. As with the old 2004 PC that I tested using as an HTPC, the Intel test PC had some pros and cons. Pros first: - The PC ran very silently -- there was no noticeable fan noise at all while the machine was on.
- It was easy to connect the PC to the TV via the built-in HDMI port, and both video and sound output were transmitted from the PC to the TV via a single HDMI cable.
- No problems at all with HD video playback.
I ran into a significant problem, though: When rendering video output at the TV's native resolution (1920x1080), the rendered screen image was "too big" for the TV. The edges of the Windows desktop, including the taskbar and Start button, were off the screen. Those elements were still present -- I could move the mouse off the screen to where the Start button should be located, click, and (partially) see the Start menu appear -- I just couldn't see them. After spending a while trying to research this problem online but running into problems getting quality Google search results when trying to search using terms like "htpc tv image too large" or "tv display edges not visible" (and multiple other variants), I finally came across an article where I learned that there is a specific word for this phenomenon: Overscan. Now, searching with search terms including the word "overscan," the quality of search results I was able to find markedly improved. However, I was still unable to solve the problem; in several hours of trying, I was unable to correct for the overscan either from the PC side, or from the TV side. Most PC monitors include geometry controls that allow the screen image size, but there were no such controls available in the my TV's built in software menu. In further poking around online, I found an avsforum.com thread that described how to access a "secret" admin/service menu where additional TV controls could be accessed; I actually got this to work on my TV and accessed the TV menu (after bypassing a warning about possibly voiding my warranty -- the TV is out of warranty anyway), but on my TV, there were no geometry controls in the admin menu, either. Finally, I tried to do a firmware update for the TV's software to see if a later version would have the geometry controls I was looking for, but the TV reported that it was already running the latest version of the software when I tried to apply the update via the TV's built-in USB port. I also investigated correcting the overscan on the PC end of things. The Intel video card comes with software that allows a lower screen resolution to be sent to the monitor/TV to correct for overscan; however, whenever I tried to apply a "non-standard" lower resolution, the Intel software itself complained that the target resolution was not supported by my display. Setting the screen to the next-lowest standard widescreen resolution (1680x1050) resulted in wide areas of black around all four edges of the display, so that wasn't a good solution either. I tried updating to the latest version of the Intel video driver and video software utility package, but that didn't help either. So, I was left with the question of whether the overscan problem would be a deal-breaker for my intended uses of the HTPC. My goals for the HTPC were as follows: Primary goal: - Be able to automatically record and playback HDTV program broadcasts. (Tivo-like DVR functionality)
Secondary goals: - Be able to use the HTPC as a secondary home PC, i.e. to do things like browse the Web, check email, and view photos and videos.
- Be able to play DVD movies (and later, Blu-Ray movies, once the price of Blu-Ray optical drives drops).
- Be able to play old NES, SNES, and N64 games that I own the cartridges for (via emulation).
- Be able to play newer games while sitting on the couch and using my XBox 360 controller for PC -- have the HTPC act as a "poor man's XBox 360." (Ironically, though, an actual XBox 360 now retails for significantly less than my overall budget for the HTPC!)
With respect to the primary goal of playing back HDTV content, I needed to be able to use the Windows Media Center (WMC) interface in order to accomplish this. With the overscan problem, several of the key UI elements of Windows Media Center appeared off the screen. However, I found a post on Aaron Stebner's WebLog detailing a series of registry keys that can control advanced options in Windows Media Center. Using these registry tweaks, I was able to get WMC to "pull in" from the screen edges its various UI elements, such that everything was visible on my screen, even with the overscan. Pretty cool. However, I had no such luck with applications outside of Windows Media Center. With the Windows taskbar, the Start button, and the edges of the Windows desktop being out of view, using the HTPC as a regular Windows PC wasn't a very nice experience. I also encountered one other problem: On the Windows desktop, thin black lines (such as "divider lines" in various applications) sometimes rendered on screen with quite a bit of "flicker". This didn't make the display unusable, but it was pretty annoying to look at. Between the overscan problem and the "flicker" problem, I made a decision not to go with an onboard Intel video card for my final HTPC build. Having had good experiences with ATI video cards in the past, I decided I would instead go with an AMD-based build including an onboard ATI video card. (The processor company AMD acquired the video card company ATI back in 2006, so now AMD is presumably using the solid ATI technology in its onboard video cards.) I did also do some testing with the Intel machine with my secondary goals in mind. Old NES and SNES games ran just fine on the PC via emulation; I was worried there might be some lag time between controller button presses and the responsiveness of the games, but there was no noticeable lag at all, and the games I tested were very playable.  I also tested a couple of newer games: World of Warcraft, and Batman Arkham Asylum. Warcraft (being a 5-year-old game at this point) ran quite acceptably when configured to use lower-end video settings. However, the game was affected by the overscan issue, making the action button bar at the bottom of the game window partially invisible, resulting in the game being not very playable, at least in full-screen mode. (The screen capture at right approximates what I was seeing on my HDTV in terms of the game image being clipped.) I also tested a couple of newer games: World of Warcraft, and Batman Arkham Asylum. Warcraft (being a 5-year-old game at this point) ran quite acceptably when configured to use lower-end video settings. However, the game was affected by the overscan issue, making the action button bar at the bottom of the game window partially invisible, resulting in the game being not very playable, at least in full-screen mode. (The screen capture at right approximates what I was seeing on my HDTV in terms of the game image being clipped.)
Batman Arkham Asylum, a newer game, ran on the PC, but the game ran very slowly, even on minimum video settings. Although the game ran, it wasn't really playable. Somewhat interestingly, rather than drop frames and run at normal speed but with a poor framerate, the game just slowed down the overall gameplay to match the throughput that the video card was able to produce -- the end result was although the display was smooth, the game just ran at about 50% of normal speed (so it took Batman an unusually long time to walk from place to place, etc.). The poor performance of the Batman game was actually in line with my expectations: I didn't expect the onboard video card to be performant for high-end gaming. My plan at this point is to run with only onboard video for the time being (sacrificing the goal of being able to use the HTPC as a "poor man's XBox 360"); at some point in the future, I'll purchase an add-on video card for the machine (or maybe, I'll purchase a new video card for my primary desktop PC, and do a hand-me-down of that PC's old video card to the HTPC). The next post in this series will (finally!) cover my final HTPC parts list, and my experiences with the completed build.
This is the second in a series of posts I’m writing about an HTPC (Home Theatre PC) build that I recently completed. To see a list of all posts in this series, click here. Having gotten free HDTV via my DIY antenna working nicely, I decided to purchase a TV tuner and try it out with my existing PC running Windows 7 (and therefore also Windows Media Center), before making the full investment in a complete set of parts for a new HTPC. I found a a pretty good overview video from Microsoft describing what it takes to hook a TV tuner card up to a PC. Doing this on a PC running Windows 7 enables the ability to be able to watch live broadcast TV on the PC monitor. It also enables Windows to record broadcast TV like a TiVo or similar DVR device – with no monthly fee! (There are some free software packages for Linux that have similar functionality, but Windows is my preferred OS, so I decided to go with Microsoft’s software solution.)  After doing some research, I decided to purchase an HVR-850 USB-connection PC TV tuner by Hauppauge. This tuner is compatible with over-the-air HDTV (ATSC) signals, and is certified to work with Windows 7. I paid about US $55 for mine (and as of the time of this writing, it’s going for $55 shipped on Amazon). (Note: This model isn’t compatible with some other types of TV signals such as “Clear QAM” from a set-top cable box; for that, you’d need a higher-end tuner part like the HVR-950.) After doing some research, I decided to purchase an HVR-850 USB-connection PC TV tuner by Hauppauge. This tuner is compatible with over-the-air HDTV (ATSC) signals, and is certified to work with Windows 7. I paid about US $55 for mine (and as of the time of this writing, it’s going for $55 shipped on Amazon). (Note: This model isn’t compatible with some other types of TV signals such as “Clear QAM” from a set-top cable box; for that, you’d need a higher-end tuner part like the HVR-950.)
Unfortunately, the HVR-850 unit that I received was DOA. I plugged it in to my PC, and Windows 7 recognized the device right away, no driver install needed. However, upon connecting the HVR-850 via the standard coax cable connection to my antenna and then scanning for over-the-air channels in Windows Media Center, the device wouldn’t find any channels. I fiddled with the HVR-850 for quite a while, but just couldn’t get it to work. Finally I had the idea to hook my old NES up to the HVR-850. The output from the NES was just barely visible on the computer screen through heavy static/snow, and the music from the game was also just barely audible through heavy static/snow as well. Therefore I concluded that the HVR-850 was “working” in that it was in fact sending some TV signal to the PC; it was just working very poorly! Apparently I just had gotten a bad HVR-850 unit. I contacted Hauppauge tech support, and they agreed based on my reported observed behavior that my HVR-850 was probably bad, and to RMA the unit under the warranty. I got my replacement HVR-850 several days later, and this time, it worked like a charm! Windows 7 once again recognized the part right away, and I was able to successfully watch live TV on my PC of the same TV channels that I could get on my regular TV. I tested the DVR functionality of Windows Media Center (WMC) for a couple of weeks, and that worked great as well. As with the TiVo I’d used previously, it was easy to select a set of shows to record, and have them record automatically. A cool feature of Windows Media Center is that while watching a program, you can easily drag the current time index of the show back and forth using the mouse, and while doing so, WMC gives you a picture-in-picture indication of what is at the target location. This makes it really easy to jump to a particular point of a show, and to quickly skip commercials. It’s nice that Windows Media Center supports control of the software via either a mouse, or via a TV remote control. At this point, I had effectively turned my primary PC into a fully-functional DVR, for just the $55 incremental purchase of the PC TV tuner above and beyond the cost of the PC hardware and software that I already owned. Not bad! However, while watching TV sitting in my office chair at my desk is okay, watching TV on my actual television while sitting on my couch in my living room would be much better! So, having proven that the Windows 7 DVR software in Windows Media Center and the HVR-850 TV Tuner worked well, I decided to proceed with the next step of going ahead and actually assembling an HTPC for my living room. Part 3 in this series will cover my attempt to save some money on parts by trying to turn my old 2004 desktop PC into an HTPC.
This is the first in a series of posts I’m writing about an HTPC (Home Theatre PC) build that I recently completed. To see all posts in the series, click here. As I’ve mentioned in a previous post on inexpensive home services, I’ve been getting High Definition (HD) TV at home for free via an over-the-air antenna for several months now. (In most markets in the U.S., since the 2009 digital transition, the major network channels, and often several others, are available 100% legally for free, in HD, via over-the-air broadcast.) This has been worked great for me, particularly for the price tag ($0/month!), but not perfectly: With my cheap $20 small store-bought antenna positioned next to my TV on the lower level of my home, I could not get the local PBS station, and I had to position the antenna just right to get several other stations (and reposition it whenever anything bumped the antenna). I set for myself a goal of getting high-quality (strong signal / reliable), hi-def TV into my home, and recording that TV via a DVR (digital video recorder) of some kind, while still maintaining a monthly TV/DVR payment $0. (If this turned out to be unachievable, I set a fallback plan of getting TV service through one of the satellite TV companies; but even a “cheap” price tag of $25/month ($300/year) was somewhat unpalatable to me compared to a potential payment of $0/year!) My first step towards this goal was to fix the situation with the reception. According to the Digital TV reception map at ftc.gov, I should be able to get a strong PBS signal at my location. My wife and I were very interested in getting PBS due to the good amount of high-quality kids’ programming on that station. I got several quotes from area companies to install a roof-mounted or in-attic antenna. All of the quotes came back for north of $500, which was more than I was willing to pay, so I started looking into other antenna solutions. Poking around online, I came across some interesting plans for a Do-It-Yourself (DIY) antenna on makezine.com. The plans involved basically assembling a small vertical frame out of wood and a metal pipe, then using pieces from some old wire hangers that are already around the house to form the actual antenna. When it comes to things other than computers, I’m not exactly a big do-it-yourself guy. However, these plans seemed simple to do and inexpensive in terms of parts, and there were quite a few very positive comments/reviews on the makezine.com article on the design, so I decided to give it a shot. Including a trip to the hardware store, the DIY antenna took about $30 in parts and about 4-5 hours of my time to construct. (I suspect someone used to building this type of thing could have completed the project a lot faster.) I set the antenna next to my TV and hooked it up, and it worked very nicely! All of the stations that I already got (including HD signals from the major networks ABC, NBC, CBS, and FOX, as well as many other high-def and standard-def channels) came in better than before. However, at this point, I didn’t get PBS. The next step was to try hooking the antenna up on the second floor of my two-story house, since antennas are supposed to work better when they are positioned higher up relative to ground level. Most of the rooms in my house are wired for cable; however, all of the cables in the basement were unlabeled. Going around my house to one cable jack at a time, I used a little ball of aluminum foil to “short out” the end of a short piece of coax cable connected to the jack, and then I was able to use an ohmmeter to identify the corresponding end of the same cable in the basement utility room. Having identified and labeled all of the cables in the basement, I used a connector to directly connect my TV-room cable to my master bedroom cable down in the utility room in the basement. Then I carried the DIY antenna up to the master bedroom, and tried the TV channels again. Success – I was now able to get PBS, in great-looking HD! The final step for the antenna was to install it up in the attic. I extended the coax cable from my master bedroom (since I intentionally do not, and will not, have a TV in there) up into the attic. Then I carried the antenna up into the attic, and hooked it up. I positioned the antenna in the attic by having my wife watch TV and report on how the signal was doing, while I talked to her via our home wireless phones, and made adjustments according to her feedback. Having found a position where all stations came in great, I left the antenna up in the attic, and closed the attic up again. End result: Great-looking and reliable high-definition TV, with my TV simply connected to the wall cable jack. If you’re looking for a fun DIY project with the end result of getting free, totally legal HD network TV plus more stations, I can recommend giving the makezine.com DIY antenna plans a shot! The next post in this series will cover my purchase of a PC TV tuner, and trying it out with the DVR software included out-of-the-box with Windows 7, called Windows Media Center.
My family and I moved into a new home south of Grand Rapids in western Michigan over the summer. Since living here, we’ve made a conscious effort to limit the monthly cost of our “big four” services: Cell phones, “land line” phone line, broadband Internet, and TV. This is how we’re doing currently: | Service | Monthly Cost | | Cell phones (2) | $16.67 | | Phone (land line) | $0.00 | | Broadband Internet | $19.95 | | HDTV | $0.00 | | Monthly Total (all services) | $36.62 | | Annual Total (all services) | $439.40 | So: A land line phone, 2 cell phones, Internet service, and HDTV for less than $40/month; not bad! Read on for the details. Cell Phones My wife Melissa and I both carry cell phones. Typical month-to-month voice plans run $70 and up for a 2-line “family plan,” but for over a year now, we’ve avoid that cost by using pre-paid plans. At the time that we dropped our prior month-to-month plan, Melissa did some research on where we could get the most bang for our buck with a pre-paid plan. We landed on a plan from Alltel offering $0.15/minute calls with no other fees, and prepaid minutes good for a full 365 days when the minutes are purchased in increments of at least $100 (per phone). So, once per year, we drop $100 on minutes for each of our phones (so $200 total), and we’re good for another year! It works out to a monthly cost of $100/12 = $8.33/month per phone, or a combined $16.67/month for both. With Alltel recently having been acquired by Verizon, though, the $0.15/minute prepaid plan is unfortunately apparently no longer available for new customers. The cheapest flat-rate prepaid plan Verizon is advertising on their site currently is a $0.25/minute plan; there’s probably another wireless provider out there with a better deal. Fortunately for Melissa and I, though, Verizon has so far continued to honor Alltel’s $0.15/min rate for us, at least for the time being! The only real downside to this approach has been that our $100/year per phone, with calls running $0.15/minute, buys us just 100/0.15 = 667 minutes of talking per phone – that’s only 56 minutes per month. Limiting our cell phone use to “emergency” or other quick-duration calls, we haven’t had a problem staying under this modest limit yet, though. (And even if we do have to buy extra minutes before an entire year has elapsed, we’re still coming out way ahead compared to a month-to-month plan. Verizon, for one, apparently realizes this, because on their “Plans” page, virtually the entire page is dedicated to marketing their month-to-month plans, with “Prepaid Plans” showing up as just one small link in the corner. Nice!) Home Phone (land line) Since we don’t use our cell phones for any “real” conversations, Melissa needs another way to call her Mom and her friends and chat! Even though the new normal for many households is to have no land line at all and use cell phones exclusively, we’ve found that it’s working very well for us to use a VoIP solution that comes with no monthly fee at all: A device called Ooma. The first I’d heard of Ooma was when my Dad told me about it just a few months ago, shortly after my family’s move into the new house. It’s similar to MagicJack in that it’s a “voice over IP” service that you can use “traditional” home phones with and has no ongoing monthly fee; but Ooma differs from MagicJack in that Ooma doesn’t require that the device be connected to a PC (and requires that it’s own software be running on that PC at all times for the phone to work). Ooma instead plugs directly into a cable modem/DSL modem or router. Ooma has a somewhat steep up-front cost; currently, it’s going for $215 on Amazon.com. However, with a $0 ongoing monthly cost for the life of the device, the break-even point comes up very quickly relative to a $35+/month traditional phone bill (about 6 months, or less) – it’s pure profit after that! Ooma has been working really great for Melissa and I so far. Even over our somewhat piddly 768k/384k DSL connection (more on that below), call quality on both ends is crystal clear – I’d characterize it as being as good as a traditional land line, and better than a typical cell phone – and it has yet to drop a call. With the Ooma device plugged directly into the DSL modem, phone calls work fine even when someone is using the Internet on the PC, since Ooma does it’s own QoS (quality-of-service) management on any devices plugged in to the network downstream of it. I have my Ooma hub plugged directly into my DSL modem, and my router plugged into the Ooma hub (so Ooma sits between the modem and the router), and I’ve found this setup to work just fine, both for phone calls and for my PC and other Internet-connected devices. Broadband Internet As I mentioned earlier, I have AT&T 768k down / 384k up DSL Internet connection, for which I’m paying $19.95/month – even though I don’t have phone service through AT&T! In many regions now, apparently, AT&T (and other DSL providers) offer what is called “dry loop” service, where you can get DSL even if you don’t have land line phone service through the same company (or any land line phone number at all). Somewhat like Verizon and their “Prepaid Plans,” AT&T hides their $20/month plan in the fine print at the bottom of a page on which they much more prominently offer other plans at $35/month and up. Even the $35/month figure, though, isn’t bad compared to the price offered by the local cable monopoly, Comcast, whose most inexpensive Internet-only plan, at the time I researched Internet options for my new home, a few months ago – without also purchasing cable TV service – was $60/month! Obviously 768k isn’t exactly blazing speed; large downloads take a while to complete, and the bandwidth isn’t sufficient for streaming high-def video (e.g. some YouTube movies). The service has been reliable, though, and I’ve found it to work perfectly well for email, browsing the web, gaming (even with both Melissa and I playing simultaneously on separate PCs), VoIP via Ooma (as described above), and even videoconferencing via the free Google Video Chat with my Dad in Florida. It also works for me, for large downloads, to just kick off the download before bed and pick up the file in the morning. (Or, at least, it works well enough for me not to feel too bad about pocketing the difference of $480 that I saved at the end of the year by not going with the faster Comcast service!) HDTV My family just last week, finally, joined the ranks of the HD-enabled: We picked up a 32-inch 720p HDTV. Previously, the only TV we had in the house was an old “analog” TV that couldn’t receive TV signals, and unfortunately I didn’t jump on the deal to pick up one of the U.S. government digital converter box coupons – now unavailable – that were being passed out for free before the U.S. digital TV transition back in June. So, we’ve had no TV at all since moving into our the new house earlier this year. (Admittedly, this was more a burden on the rest of the family than on me, since I tend to spend my free time on the PC, playing games, or reading, rather than in front of the TV.) Now that we have a TV capable of receiving digital over-the-air signals, I ordered an HDTV antenna from Amazon – an inexpensive RCA ANT1400M Flat HDTV Antenna (currently going for $25) – and it’s been working great! After some brief fiddling with the antenna – I ended up getting the best results by propping up the flat antenna at about a 30-degree angle, rather than either leaving it flat on the tabletop, or standing it up vertically – we get NBC, CBS, FOX, and ABC, all in great-looking HD. (We get about a dozen other digital stations, too, including some that I’d never even heard of, such as the kids’ station qubo.) It was nice to sit and watch some football at home (in HD!) this past Sunday after getting the antenna hooked up for the first time – having the $0/month ongoing cost in the back of my mind certainly didn’t detract from the enjoyment. :-) So basically, I’m cheap – but I like it that way I’ve got the four major “bundle” services running now for a combined cost of less than $40/month – but obviously with some caveats: - We have two cell phones – but they’re for limited/emergency use only
- We have broadband Internet – but only 768k downstream
- We have HDTV – but only the major networks, plus a dozen or so other random stations
- We have home phone service - (actually, no real caveat here, it works just fine!)
I can live with those caveats, though, in light of this chart – repeated from the top of this post, but updated to include a comparison to some of the other service options I mentioned: | Service | Provider | Monthly Cost | Provider | Monthly Cost | | Cell phones (2) | Alltel Prepaid (grandfathered) | $16.67 | Verizon Family "basic" plan (cheapest advertised 2-phone plan on the Verizon site) | $69.99 | | Phone (land line) | Ooma | $0.00 | None ("Who needs a land line anymore?") | $0.00 | | Broadband Internet | AT&T dry loop, 768k down | $19.95 | Comcast Economy Internet, 1M down (cheapest advertised Internet plan; bundle with Comcast cable TV required to get rate) | $24.95 | | HDTV | Digital TV + RCA ANT1400M Antenna | $0.00 | Digital TV + Comcast Digital Preferred (cheapest advertised rate; non-"introductory" ongoing rate) | $74.94 | | Monthly Total (all services) | | $36.62 | | $169.88 | | Annual Total (all services) | | $439.40 | | $2038.56 | | Annual Savings | | $1599.16 | | -- | So, yeah: I’m cheap, and the services I’ve got do include a few “caveats”… but that extra $1600 in my pocket at the end of every year works out to the equivalent of quite a few dinner dates out at a restaurant for Melissa and I. :-)
|
|




 Posts
Posts

